You’ve just had your tiles cleaned and when you first walk in, they look great.
You walk around just looking at the floor, amazed by the difference.
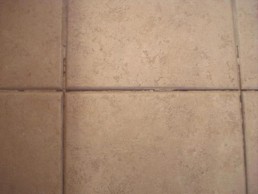
But the more you look, the more you start to notice things – mainly the variation with the grout. Your first reaction is to call me over and ask “What have you done to my grout?”
My answer is usually “I’ve cleaned it and now that all the grime and gunge is gone, now you can clearly see the grout, along with all the faults”.
There are a number of reasons why the grout on your floor is damaged or discoloured.
Incorrect Grout
A number of problems can result from choosing the incorrect grout including
- a tile that has a high moisture absorption rate
- movement in the substrate
- improper curing caused by extreme temperature changes
- improper mixing of the grout.
Below, are some examples of problems encountered due to improper preparation and installation of grout mixtures.
- A common installation error is excessive use of water during the clean-up process prior to the initial curing of the grout. This may result in residue on the surface of the grout, low grout joints, and inconsistent colour.
- Another important consideration in the application of grout is to ensure that grout joints are uniform in depth to maintain an appearance of consistent colour.
- It is also important to follow the manufacturer’s instructions for the preparation of the grout for installation (i.e., type and quantity of liquids that are added to the dry grout powder) to maintain consistency. Most manufacturers require a slow speed mixer to
combine materials to avoid air entrapment, and allowing the grout to stand for the recommended period of time prior to use (i.e., slaking). - Inspectors should also determine whether the grout joints were free and clear of mortar and debris prior to grout installation.
- It is also important to know whether a tile with a high moisture absorption rate was dampened prior to grouting.
- Finally, inspectors should ask whether cement-based grout was cover-cured with Kraft paper for a period of 72 hours following installation.